Alta Via 1 Dolomites: A Hiker's Guide to the Iconic Italian Mountain Trail

From planning and travel tips to backing list and epic photography, here we show all you need to know about the stunning hut-to-hut hiking route

Alta Via 1 Dolomites: A Hiker's Guide to the Iconic Italian Mountain Trail

Author

Natasha Chalmers

Photographer

Natasha Chalmers

Camera

Nikon 35Ti, Nikon FG

Film

Kodak Gold 200, Portra 400

Natasha Chalmers is a film photographer from New York City, currently based in Madrid. See more of her work in FM03: HIKE, Field Mag's new photo zine.


I always say the golden ticket to having a good time on the trail is having a sense of humor. And being prepared—prepared for anything. And when it comes to the Alta Via 1 Dolomites hike, these are all essential, especially the planning part.

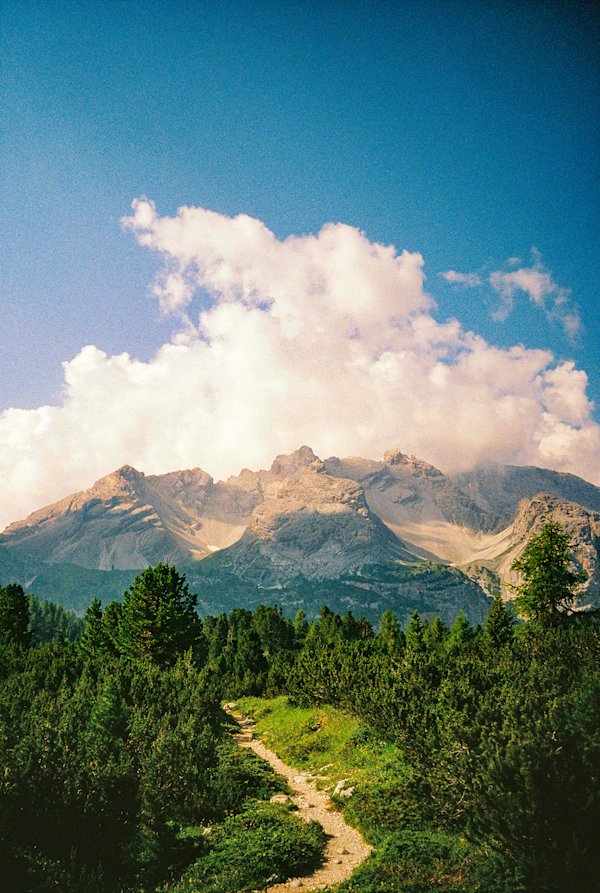
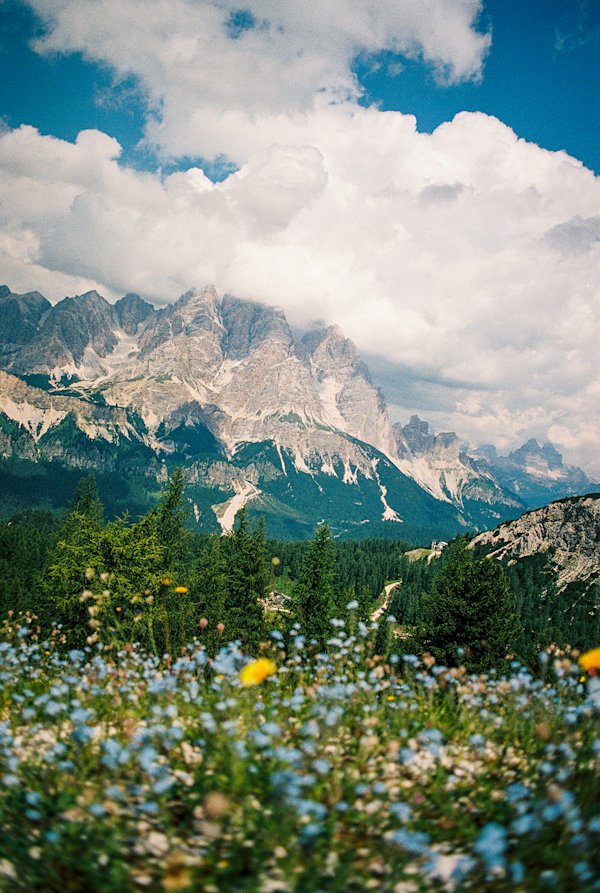
The Alta Via 1 (aka AV1) is a multi-day hut-to-hut hike in Italy that cuts through some of the most beautiful sections of the Dolomites and takes you past glistening lakes, jagged peaks, and endless meadows of wildflowers. Also known as the Dolomite High Route 1, this public walking trail is notoriously tough—and the altitude makes it even tougher.

Like any good adventure, you’ll hit a ton of road bumps and you will just have to find a way to laugh it off. But let me tell you, for this adventure, I wish I had a better guide from the start, so I put together this AV1 hiking guide to help you avoid the missteps I made.

Read on for a full rundown of Alta Via 1 Dolomites info, pro tips, packing checklist, and more. And remember, proper planning pays off!

chalmers-alta-via-1-guide-4

chalmers-alta-via-1-guide-cows

Alta Via 1 Dolomites Rundown

The famous Alta Via 1 in the Dolomites is a roughly 120 km (75 mi) route that runs from Lago di Braies in South Tyrol in the North all the way down South to a bus stop known as La Pissa just outside the picturesque town of Belluno. The AV1 is generally considered moderate to difficult, with approximately 7,400 m ( 24,000 ft) in elevation gain. Most hikers complete the hut-to-hut route in anywhere from 6-11 days. We chose to hike it in nine days, which felt perfect. You can do it in less days, but I wouldn’t. It can also be hiked with a guide, but I enjoyed my self guided Alta experience. What makes this trail so great is being able to take your time to experience the unique beauty of each stage, so having the extra time to complete it without feeling rushed is highly recommended.

The trail is supported by dozens of mountain huts, also known as refugios, that range from basic cabins to super well equipped accommodations. They all have exceptional food, views, and comfortable places to sleep. So you really can’t go wrong with any of them—though be warned, they will make it difficult to imagine carrying days worth of food in your backpack ever again.

Plan Ahead

My boyfriend Sal and I initially sat down to book our Dolomites Alta Via 1 trek eight months ahead of our target hiking date. And even then we still had to do some frantic emailing, calling, and rescheduling to get the dates we wanted. And just when we thought we had planned everything perfectly, as we started our journey to the trailhead we realized we forgot to purchase bus tickets that had sold out a month prior. Don't do that. Consider this your 100th reminder to make a checklist of all your bookings and triple check it!

Part of planning ahead is also knowing that along the route there are no stores, no ATMs, no official campsites on the main route (though plenty of refugios), and depending on the month, water may be sparse, too.

chalmers-alta-via-1-guide-10

chalmers-alta-via-1-guide-9

What to Know About Alta Via Refugios

At the end of each long day filled with miles of rugged trail and thousands of feet of elevation gain, you will be greeted by one of roughly 30 wonderful refugios that sit along the route. As mentioned before (and more below), planning is key to a successful AV1 trek, this includes booking rifugi ahead of time, especially if you plan to hike during the peak season from July to mid-September. While some rifugi may have space for walk-up hikers, they often fill up quickly, so plan accordingly.

It's also important to remind that wild camping is generally not allowed on the Alta Via 1 or in most of the Dolomites in general—the region is a protected UNESCO World Heritage site, and there are strict regulations to preserve its natural beauty and ecosystems.

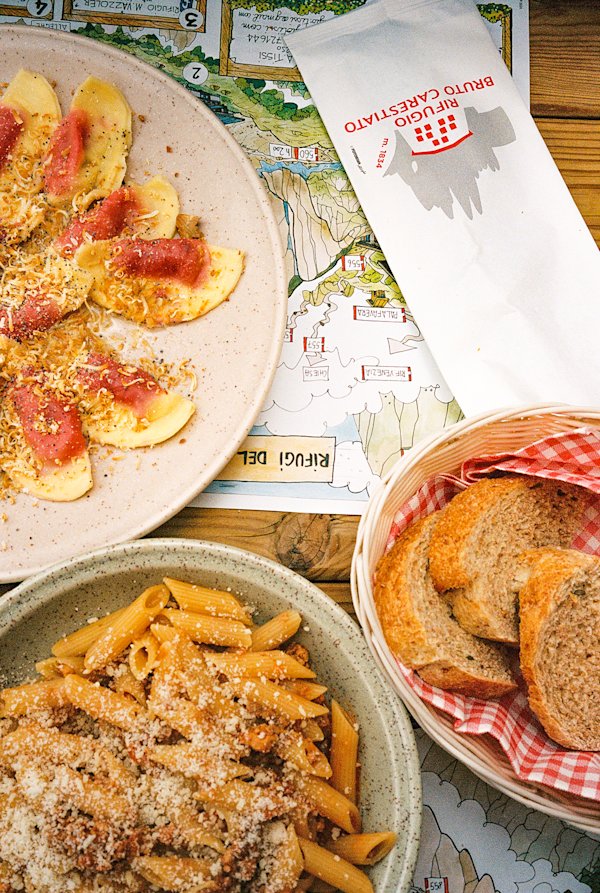
Good news is, if properly booked, the many rifugi offer not only an opportunity to get a good night's sleep but also a great opportunity to eat endless bowls of pasta and plates of polenta with fried cheese. If you’re lucky, you will even come across a local dish known as Casunziei, which consists of the most delicious pillow-like half-moon pasta filled with beets and tossed in butter, cheese, and poppy seeds. If there is anything I can guarantee, it's that you will not go hungry on the AV1.

You will also meet so many wonderful people along the way. Given the nature of the AV1, you may find yourself hiking with the same people the whole way through. We ended up meeting hikers from around the world over the course of our nine days, ranging from a Brazilian couple in their 30s who quit their jobs to travel the world, an unlikely Dutch friendship duo on their annual hiking trip, and a teacher from the US enjoying a self guided Alta Via 1 trek. It was a real treat to meet so many other hikers along the way who were all experiencing the same incredible journey as us.

chalmers-alta-via-1-guide-5

chalmers-alta-via-1-guide-6

When to Hike the Alta Via 1:

The hiking season for the Alta Via 1 is from mid-June to mid-September. This is when the huts are up and running, and the snow on higher passes has melted. We went the last two weeks of July and I could not have been happier with the conditions. Cool mornings and long, warm days. While you can expect the weather to be quite consistent (sunny mornings and thunderstorms in the afternoon), I would be prepared with layers and rain gear for a range of weather possibilities on the trail. Snow is also very common on the AV1, especially once you approach September. So whenever you choose to go, just know you might need a little luck for good weather and conditions, too.

Recommended Trail Stages:

Below, is the nine day route we chose, with the distance, gain, and rifugios we slept at each night. Keep in mind that there are some variations to each section so you can oftentimes choose to make your days slightly longer or shorter. This is just what we did:

  • Day 1: Lago di braies to Rifugio Biella - 6km, 870m ascent
  • Day 2: Rifugio Biella to Rifugio Lavarella - 13km, 710m ascent
  • Day 3: Rifugio Lavarella to Rifugio Lagazuoi - 12km, 1,100 m ascent
  • Day 4: Rifugio Lagazuoi to Rifugio Averau - 12km, 1,100m ascent
  • Day 5: Rifugio Averau to Citta di Fiume - 13km, 480m ascent
  • Day 6: Citta di Fiume to Rifugio Vazzoler - 19km, 1010m ascent
  • Day 7: Rifugio Vazzoler to Rifugio Carestiato - 9km, 620m ascent
  • Day 8: Rifugio Carestiato to Rifugio Pian de Fontana - 19km, 1,050m ascent
  • Day 9: Pian de Fontana to La Pissa bus stop - 11km, 200m ascent

chalmers-alta-via-1-guide-8

chalmers-alta-via-1-guide-1

Tips for the Trail:

  • Hike from North to South. This is the more popular direction and for good reason. You are facing the most gorgeous views the whole way and you will be hiking the same way as many other hikers so you can stay with your new friends till the end!
  • Book the rifugios well ahead of time (at least six-months). Given there is no central reservation system for the rifugios you will need to contact each one directly.
  • Buy your bus tickets ahead of time no matter where you are coming from. You will most likely transfer in Dobbiaco so make sure you have your tickets beforehand.
  • Bring cash. Many rifugios do not accept credit or debit cards and you do not want to find yourself in a situation where you can’t pay for your stay or a warm meal.
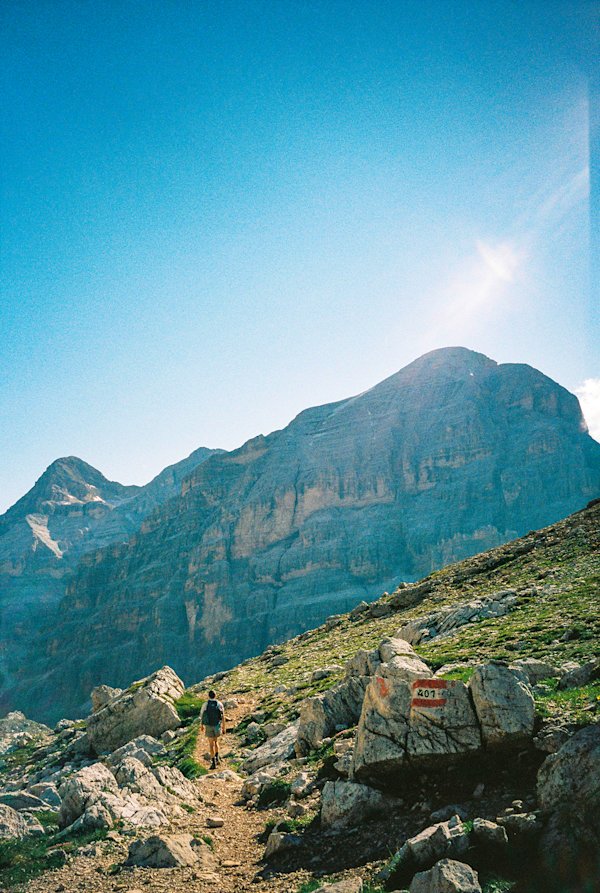
  • Bring a good map. Though much of the AV1 is well marked with paint blazes, there are some sections where signage is lacking. Make sure you have a map that you feel comfortable navigating with, be it digital or physical.
  • Be prepared for all weather conditions. Do not underestimate the weather here even when hiking in the summer months. Hiking with a Garmin InReach is suggested for emergency communication.
  • Start early in the day. Rain and thunderstorms tend to roll in most afternoons so you will want to make sure you are in your rifugio by this point and not still on the trail.

chalmers-alta-via-1-guide-thumbnail

AV1 Hut-to-Hut Trip Highlights:

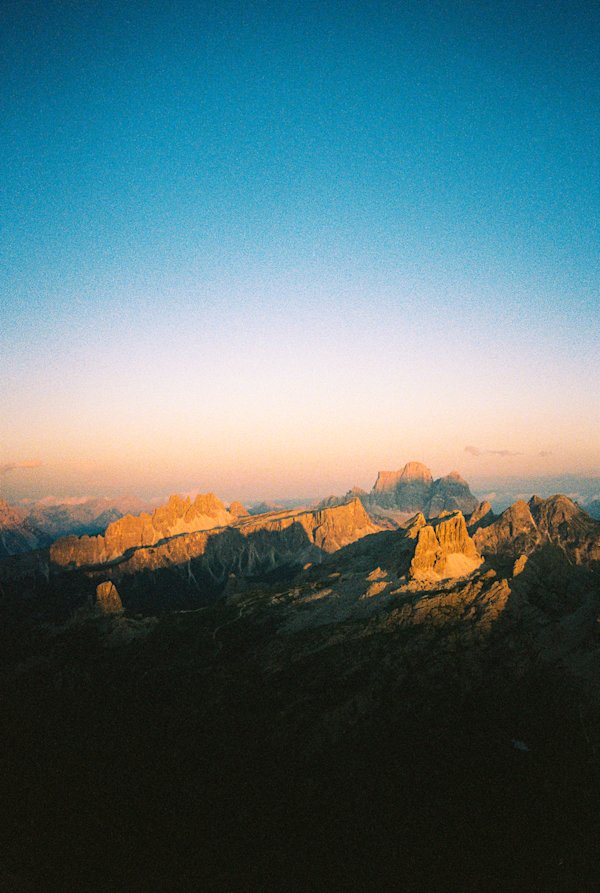
Rifugio Lagazuoi: This is the highest point of the AV1 standing at a whopping 2,752 m (9,029 ft). As you can imagine the views are spectacular from up here and it provides one of the most beautiful sunsets of the whole hike. You can also visit some of the restored WW1 tunnels and Via Ferrata route in the area.

Cinque Torri: The section between Rifugio Lagazuoi and Rifugio Averau takes you past the glorious Cinque Torri (Five Towers). Not only are the natural stone towers themselves absolutely stunning but the scenery in all directions from there is, too.

Lago Coldai: About 15 minutes after you pass Rifugio Coldai you will come across Lago Coldai. The lake itself is stunning and is followed by a really exceptional section of trail that takes you down a path with huge peaks on one side and views down into the nearby towns on the other.

Rifugio Nuvolau: This traditional hut was built in 1883 and sits on a hilltop with 360-degree views of the Dolomites. Pretty wild. (Other huts we did not visit but are reportedly epic include Rifugio Fanes, Rifugio Sennes, which many folks stay at on night one, and Rifugio Tissi, which is not technically on the AV1 but is supposed to be so special many hikers detour to it for a unique visit.)

chalmers-alta-via-1-guide-11

chalmers-alta-via-1-guide-12

Alta Via 1 Packing List:

Before packing for the Alta Via 1 Dolomites hike you should consider two important questions: how much money do you want to spend on the trail, and how heavy of pack do you want to hike with. If you're going full vacation mode and plan to enjoy all main meals in each hut you will only need to carry minimal gear (plus plenty of cash to cover hut fees, meals, and misc add-ons). If you plan to cook meals on your own, your pack will be much heavier. Below is a list of essentials to pack beyond your usual hiking kit, leaning on the former option.

  • Backpack: One of the best parts about doing the AV1 is that there is no need to carry a week's worth of food or a tent with you thanks to the refugios. A 30-45 liter pack will be more than plenty.
  • Sleeping bag liner: Most of the refugios require you to have a sleeping liner with you. They pack down super small and are definitely worth the investment.
  • Rain gear: We didn’t see much rain on our trip but when it rained it really poured. Make sure you bring your rain gear (including a pack cover) with you and extra points if it is lightweight, it is often both hot and pouring.
  • Hiking Poles: There are some very daunting downhill sections on the AV1 that I was beyond grateful to have hiking poles for. Even if you don’t usually hike with them you might want to consider it for this hike.
  • Shorts: Ideally lightweight and quick drying, the latter especially helpful if you get caught in a rain shower or want to do a quick sink wash mid trip.
  • Pants: Not mandatory but hiking pants can keep you cozy on chilly mornings and block sun during the height of the day, too.
  • T-Shirts: Typically I pack a lightweight long sleeve merino top for chilly mornings and sleeping, plus another merino short sleeve for hiking. A cotton T is a luxury to toss on after a shower at the end of the day (not ideal for hiking though).
  • Long sleeve shirts: Button down hiking shirt or UPF sun hoodie.
  • Fleece: Lightweight will do the trick.
  • Windbreaker: A rain jacket can also pull double duty here.
  • Slides: Best not to wear your hiking shoes or boots in the huts. Though many have slippers to borrow, bringing some house shoes is a nice move.
  • Hat: Keep the sun off your face and look cool doing it. Win-win.
  • Sunglasses: Same as above.
  • Snacks: You can buy snacks and sandwiches to go at most all refugios. You will not go hungry on the AV1.
  • Water bottle: Staying hydrated is even more important when hiking at elevation. An insulated bottle is heavier than a classic Nalgene, but may be worth the extra ounces of weight if you hike with your bottle on the side of a backpack in direct sun.
  • Map & Compass: As mentioned above, trails are often well marked, but being comfortable navigating with a map is highly recommended, especially if you plan to travel off route.
  • Travel towel: If you plan to take advantage of the refugio showers (please do) then it's best to bring a small travel towel of your own.
  • First aid kit: Because you never know!
  • Sunscreen & Toiletries: The usual.

Bonus:

  • Earplugs: Need I say more? Sharing a room with a dozen other hikers means lots of shuffling, snoring, and alarms going off. You’ll thank yourself for having them with you.
  • Camera: The views are beyond words so you will definitely want to capture them on more than just a phone. Bonus points for bringing a film camera.

chalmers-alta-via-1-guide-3

chalmers-alta-via-1-guide-7

Related articles
The Jasper Zionic Adapts KEEN's Iconic Approach Shoe for Modern Life

Hands-on with the all-new outdoor sneaker, built with a climbing style upper inspired by the Jasper and the Zionic's rugged performance outsole

How to Choose Between Lightweight and High-Capacity Hiking Backpacks
Lightweight vs. High-Capacity Hiking Backpacks: A Comparison Guide

Multi-day backpacking trips require the right kind of pack -- here's how to choose the right style for your needs

How to Pick the Perfect Hiking Backpack, According to a Pro Gear Tester
How to Select the Perfect Hiking Backpack: Pro Tips & Recommendations

Using the right backpack makes all the difference for comfort and convenience when hiking - here's how to find the right one for you

How to Pack Your Hiking Backpack Like a Pro
Maximizing Comfort and Efficiency: Packing Tips for Hikers

With 20+ years experience, our gear expert dives into the art of packing a hiking backpack for maximum comfort and efficiency in the great outdoors

16 Japanese Outdoor Brands You Should Know
16 Japanese Outdoor Brands You Need to Know About

Japan's longstanding culture of hiking, camping, skiing, and taking in nature is alive and well thanks to a growing group of design-minded gear makers

Green Trails: A Guide to Eco-Friendly Hiking Gear and Avoiding Greenwashing
A Hiker's Guide on Where to Find Eco-Friendly Gear for Responsibly Hitting the Trails

Choosing earth-friendly hiking gear can positively impact the environment — and your body — more than you might expect. Here are our top picks

More articles
Alta Via 1 Dolomites: A Hiker's Guide to the Iconic Italian Mountain Trail

Gallery Mode

Photographer

Natasha Chalmers

Camera

Nikon 35Ti, Nikon FG

Film

Kodak Gold 200, Portra 400

Back to article